
Data security is the backbone of any successful web hosting strategy, and Plesk offers a robust solution to safeguard your precious digital assets through its Backup Manager. In this blog post, we’ll guide you through the step-by-step process of configure backups with Plesk, empowering you to establish a reliable safety net for your websites, databases, and configurations.
Why we configure backups with plesk
Configure backups with Plesk, or any web hosting environment, is crucial for several reasons:
- Data Protection:
- Backups act as a safety net, protecting your valuable data from accidental deletion, server failures, or unforeseen issues. In the event of data loss, you can restore your website, databases, and configurations to a previous state.
- Disaster Recovery:
- Natural disasters, hardware failures, or cyber attacks can result in the loss of data. Regular backups ensure that you can recover your website and associated data quickly, minimizing downtime and business disruption.
- Software Updates and Changes:
- Before making significant changes to your website, such as updating plugins, themes, or making configuration adjustments, it’s wise to take a backup. This precautionary step allows you to roll back to a stable state if issues arise during or after the updates.
- Security Incidents:
- In the unfortunate event of a security breach or malware attack, having a recent backup can be crucial. You can restore your website to a state before the compromise, ensuring that your visitors are not exposed to potential security risks.
- Testing and Development:
- Backups are valuable for testing new features, design changes, or any alterations to your website. Before implementing changes on your live site, you can restore a backup to a staging environment for testing purposes.
- Migration and Server Upgrades:
- When migrating your website to a new server or upgrading server hardware or software, having a backup ensures a smooth transition. If any issues arise during migration or upgrades, you can revert to a known good state.
- Compliance and Regulations:
- Depending on your industry and location, certain regulations may require you to have reliable backup mechanisms in place to protect user data. Compliance with these regulations is essential to avoid legal and financial consequences.
- Peace of Mind:
- Knowing that your data is securely backed up provides peace of mind. It allows you to focus on growing your website or business without constant worry about potential data loss scenarios.
Steps for How to Configure Backups with Plesk
Configure backups with Plesk is a crucial step in ensuring the safety and recoverability of your website data. Here are the step-by-step instructions to configure backups with Plesk:
Log in to Plesk
Access your Plesk control panel using your web browser. Enter the URL provided by your hosting provider and log in using your Plesk username and password.
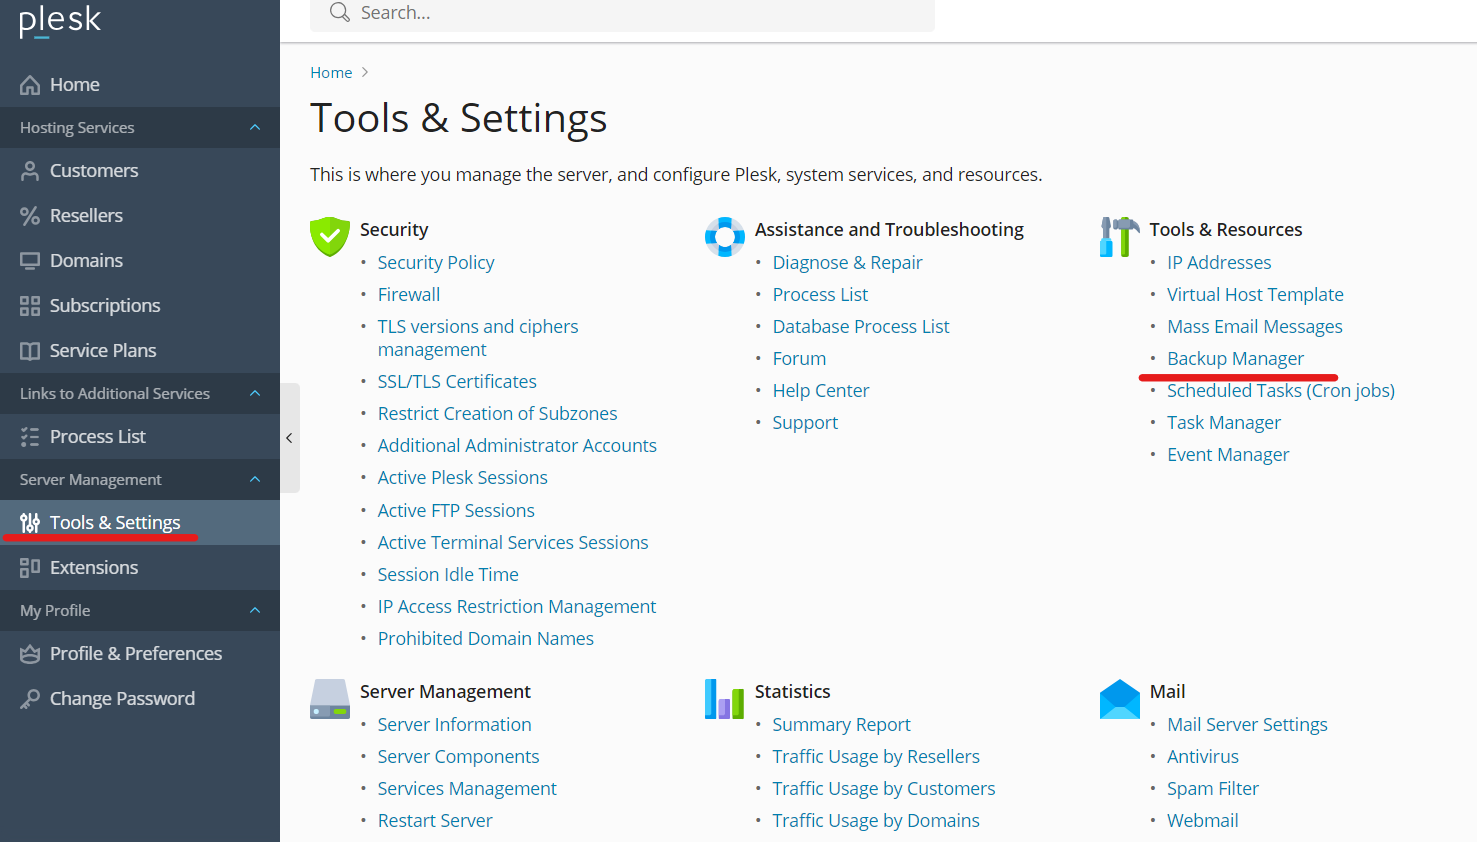
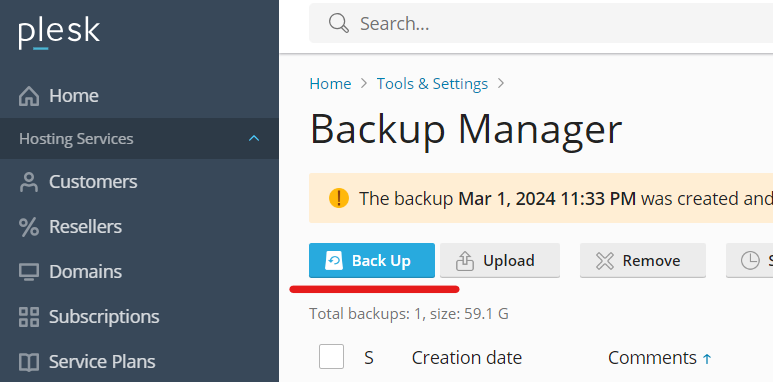
Navigate to Backup Manager
Once logged in, navigate to the “Tools & Settings” section. Within this section, find and click on “Backup Manager.” This is where you’ll configure and manage your backup settings.
Choose Backup Settings
Within the Backup Manager, customize your backup plan by adjusting various settings:
Backup Type: Select the type of backup you want: Full, Incremental, or Differential. Choose based on your data protection needs.
Backup Schedule: Set the frequency of backups (daily, weekly, or custom) and specify the time of day. Consider your website’s usage patterns to minimize the impact on performance.
Backup Storage: Choose where to store your backups. Plesk supports local storage and various remote options such as FTP, Google Drive, or Amazon S3. Set up the storage location and provide authentication details.
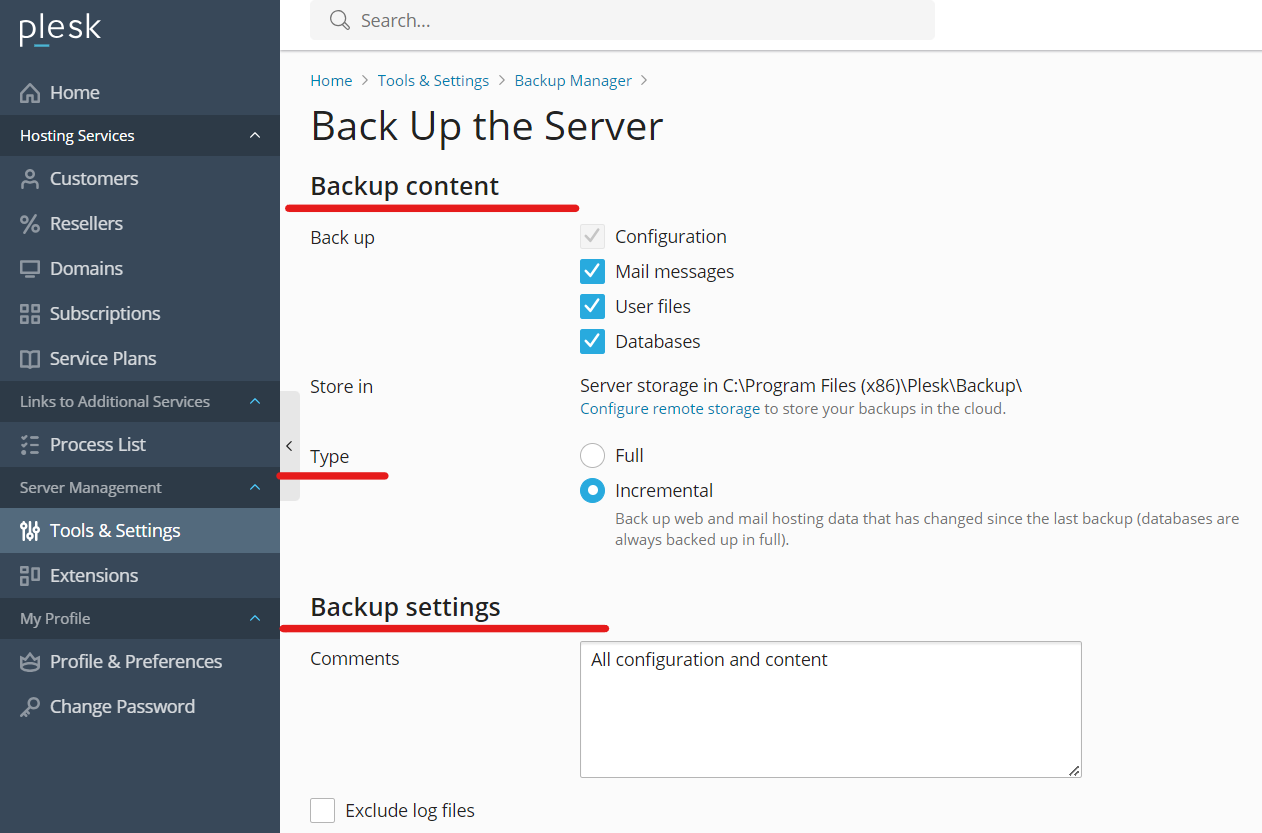
Select Data to Include
Specify the data to be included in your backups:
Full Server Backup: Ensure all server data, configurations, and websites are included.
Domain-Level Backups: Choose specific domains and their associated data for more granular control.
Customer-Level Backups: Opt for customer-level backups to include all domains, databases, and mail settings associated with a particular customer or subscription.
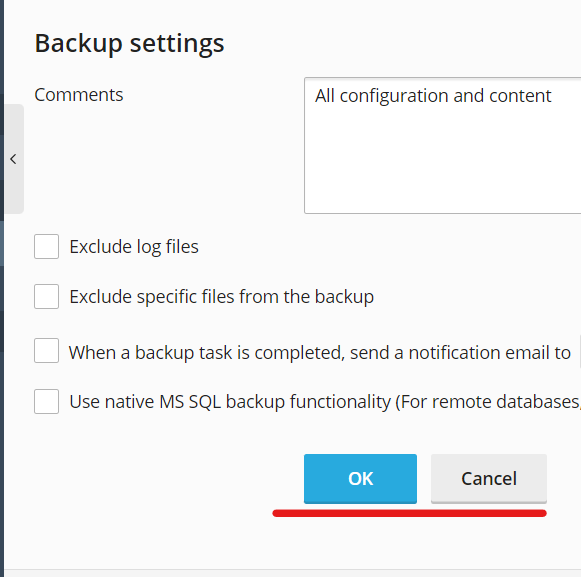
Advanced Settings (Optional)
Explore advanced settings based on your specific needs:
Exclusions: Exclude certain files or directories from backups if needed.
Notifications: Set up email notifications to stay informed about the status of your backups.
Saving and Activating Backup Settings
Once you’ve Configure backups with Plesk backup settings, save your changes and activate the backup plan. Plesk will now automatically follow your specified schedule, creating a safety net for your data.
Conclusion
Configure backups with Plesk is a crucial step in fortifying your digital fortress. By following these steps and customizing your backup strategy, you’ll have peace of mind knowing that your data is protected and recoverable in the face of unforeseen challenges. Remember, a well-architected backup plan is the unsung hero of resilient web hosting.