
Migrating user accounts between servers can be a complex task, but with cPanel’s Transfer Tool, the process is made significantly easier. This guide will walk you through how to use the Transfer Tool to move user accounts from one server to another seamlessly.
Whether you’re upgrading your server, moving to a new hosting provider, or simply consolidating accounts, the Transfer Tool ensures a smooth migration without losing important data. Let’s dive into how you can successfully migrate user accounts using the Transfer Tool in cPanel.
What is the Transfer Tool in cPanel?
The Transfer Tool in cPanel is a powerful feature that allows you to migrate cPanel accounts, databases, email configurations, and other settings between two servers. It automates much of the migration process, ensuring a smooth transition of accounts with minimal manual intervention.
Pre-Migration Checklist
Before starting the migration process, it’s important to check a few things to avoid potential issues:
- Ensure Both Servers Are Running cPanel: The Transfer Tool is designed for cPanel-to-cPanel migrations. Ensure both the source and destination servers are running cPanel.
- Backup All Accounts: Even though the transfer process is generally smooth, it’s always a good idea to create backups of all user accounts before migration.
- Verify Server Connectivity: Ensure both servers can communicate with each other. They need to be able to send and receive data securely.
- IP Address and DNS Records: Check if you need to update DNS records after the migration, particularly if the IP addresses of your servers are changing.
- User Permissions and Quotas: Make sure that user permissions and quotas are set up correctly on the destination server.
Step-by-Step Guide to Using the Transfer Tool in cPanel
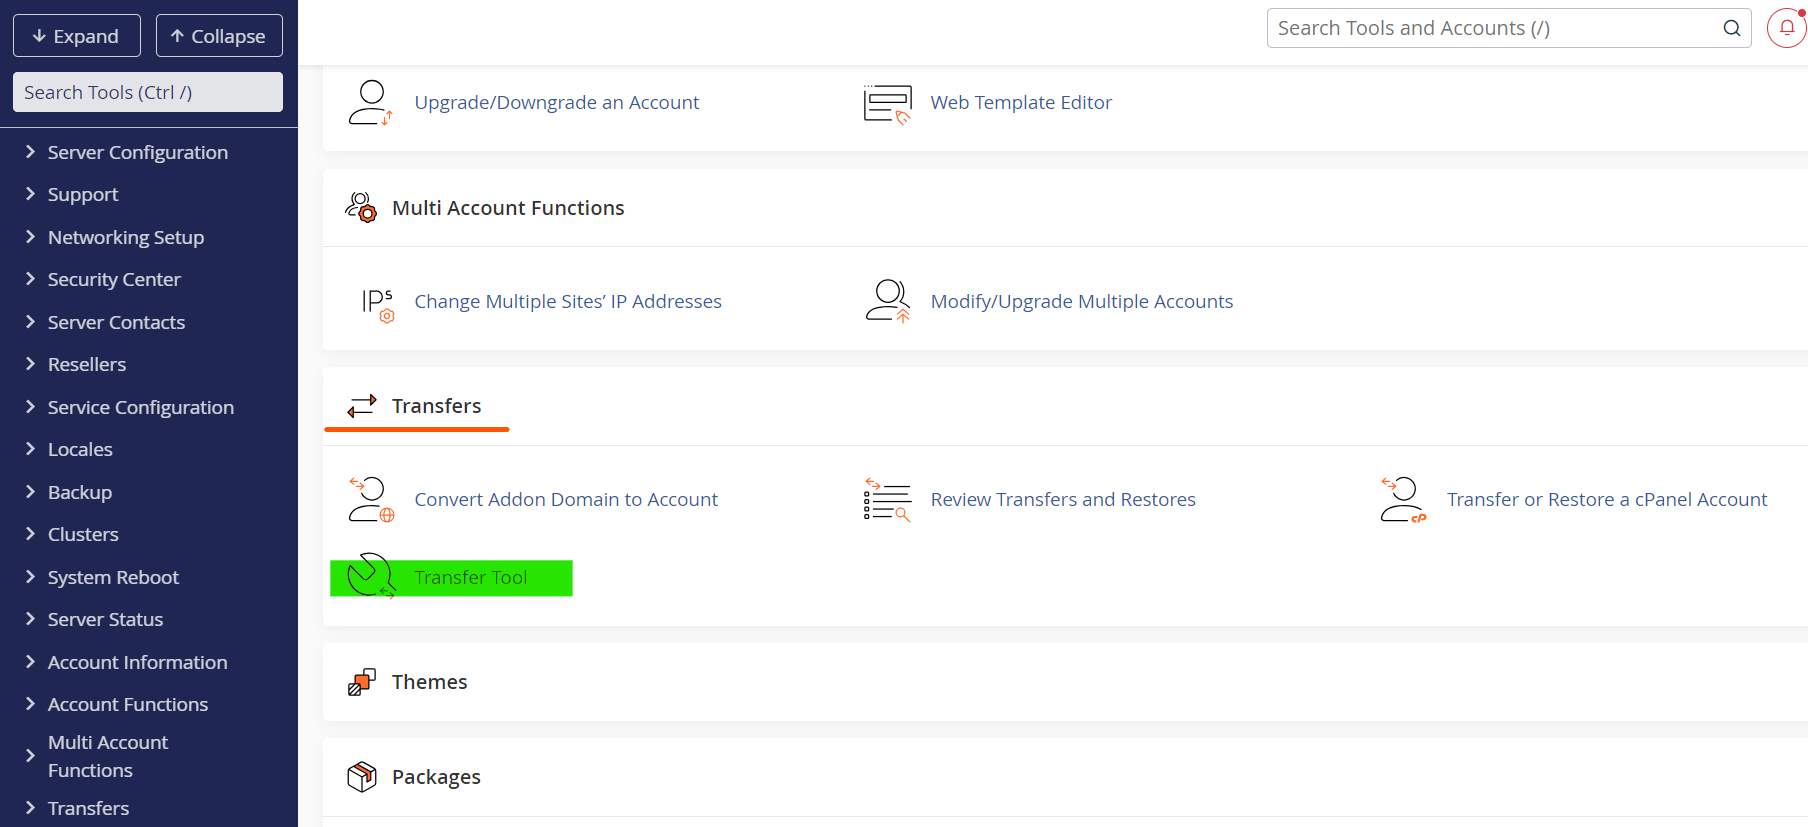
Step 1: Access the Transfer Tool in WHM
To start migrating accounts, you first need to access the Transfer Tool through WHM (WebHost Manager).
Log in to WHM on your destination server.
In the search bar, type Transfer Tool.
Click on Transfer Tool under the Transfers section.
Step 2: Configure Source Server Information
Once the Transfer Tool interface is open, you need to provide details about the source server from which you’ll be migrating the accounts.
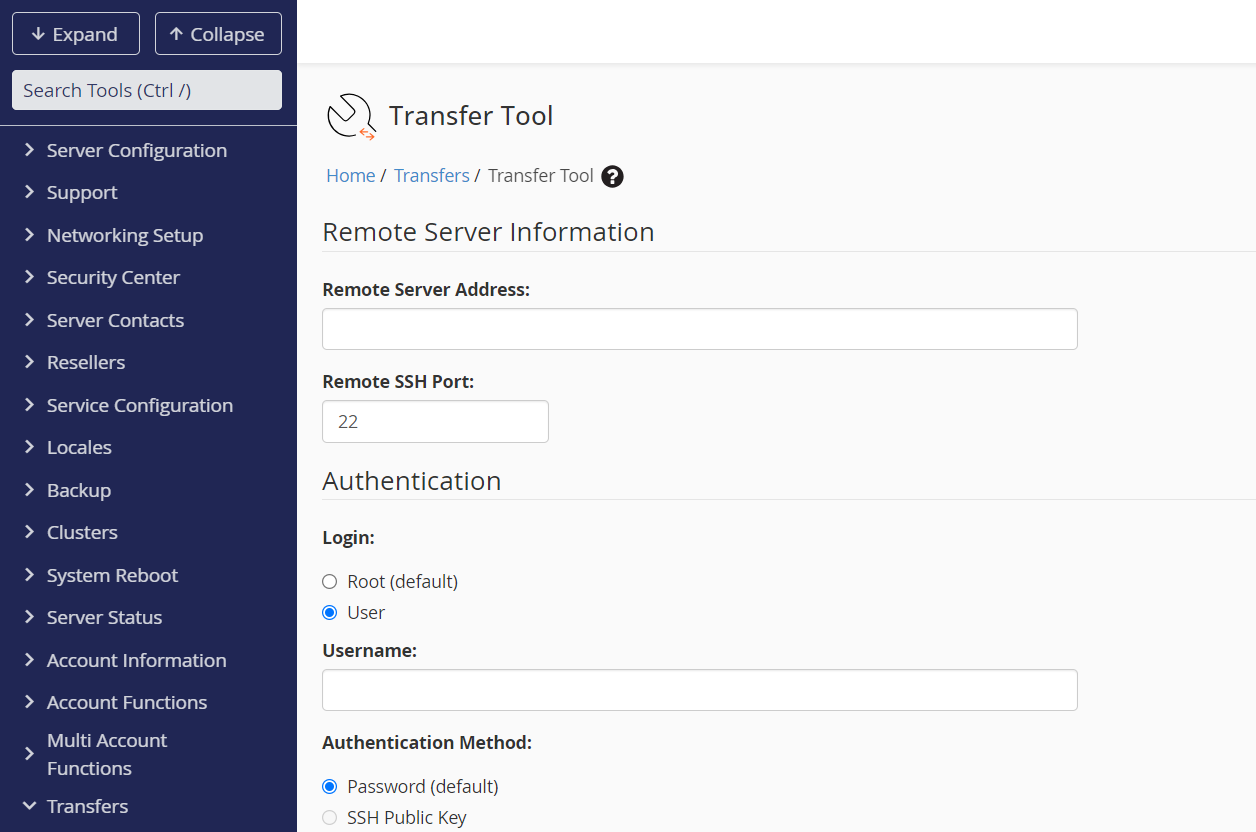
- Source Server Type: Select the type of server (e.g., Remote or Local).
- IP Address: Enter the IP address of the source server.
- Authentication Type: You’ll need to authenticate with the source server. You can use either the root password or SSH keys.
- SSH Port: Enter the SSH port of the source server. By default, this is usually set to 22, but it might differ depending on your configuration.
Step 3: Select Accounts to Transfer
Once you’ve authenticated the source server, cPanel will display a list of user accounts available for transfer.
- Select Accounts: Check the boxes next to the accounts you wish to migrate.
- Settings: You can choose to preserve settings, quotas, and packages from the source server or assign new ones on the destination server.
Step 4: Configure Transfer Settings
In this step, you can adjust specific settings for the migration.
- Transfer Method: Choose whether to transfer the account data using the Compressed or Uncompressed method. Compressed transfers may be slower but use less bandwidth, while uncompressed transfers are faster but require more bandwidth.
- Check for Conflicts: Ensure that there are no account conflicts on the destination server (e.g., two accounts with the same username).
- Settings and Preferences: You can decide whether to copy the account’s settings, configurations, email, and DNS records from the source server.
Step 5: Initiate the Transfer
Once all configurations are set, click the Copy button to start the transfer process. cPanel will begin copying the user account data from the source to the destination server.
- Progress Bar: You’ll be able to monitor the progress of the transfer. Larger accounts will take more time to migrate.
- Logs: cPanel provides a detailed log of the migration process, including any errors that might occur.
Step 6: Post-Migration Tasks
After the migration is complete, there are a few things you should check:
- Verify Account Data: Make sure all files, databases, and settings were transferred correctly.
- Test Websites: Check that the user websites are functioning properly on the new server.
- Update DNS Records: If the server IP address has changed, you will need to update DNS records for the domains.
- Email Configuration: Ensure that email services are working properly for the migrated accounts.
Troubleshooting Common Migration Issues
Even though the Transfer Tool is user-friendly, issues can sometimes arise. Here’s how to troubleshoot some common problems:
- SSH Connectivity Issues: If the destination server cannot connect to the source server, ensure that SSH is properly configured and that the firewall is not blocking the connection.
- Account Quota Errors: If you run into quota errors, check that the destination server has enough disk space to accommodate the transferred accounts.
- Incomplete Transfers: If the transfer is interrupted, check the log files to identify the issue and reinitiate the process.
Benefits of Using the Transfer Tool
- Efficiency: The Transfer Tool automates the entire migration process, making it faster and less error-prone.
- Data Integrity: It ensures that all user data, including files, emails, and databases, are migrated without loss.
- Customizable: You have full control over which accounts to migrate, what settings to preserve, and how the migration is handled.
- Security: cPanel’s Transfer Tool uses secure methods for transferring data, such as SSH, ensuring that user information remains protected during the process.
Conclusion
Migrating user accounts using the Transfer Tool in cPanel is an efficient and secure way to move data between servers. With its user-friendly interface and flexible options, you can ensure a smooth and successful migration. By following the steps in this guide, you’ll be able to transfer accounts with confidence, minimizing downtime and maintaining data integrity.
Whether you’re moving to a new hosting provider or upgrading your server, the Transfer Tool simplifies the process and gives you peace of mind. Be sure to test the migrated accounts and update DNS records where necessary, ensuring everything runs smoothly on the new server.